Tuesday, 23 July 2013

TPC July #3

Hey all!!! So, its the third day of the July TPC and I was in a hurry and could not create anything good, I just did a very simple mani using the nail polish which I have selected for this month. The mani which I created is- 


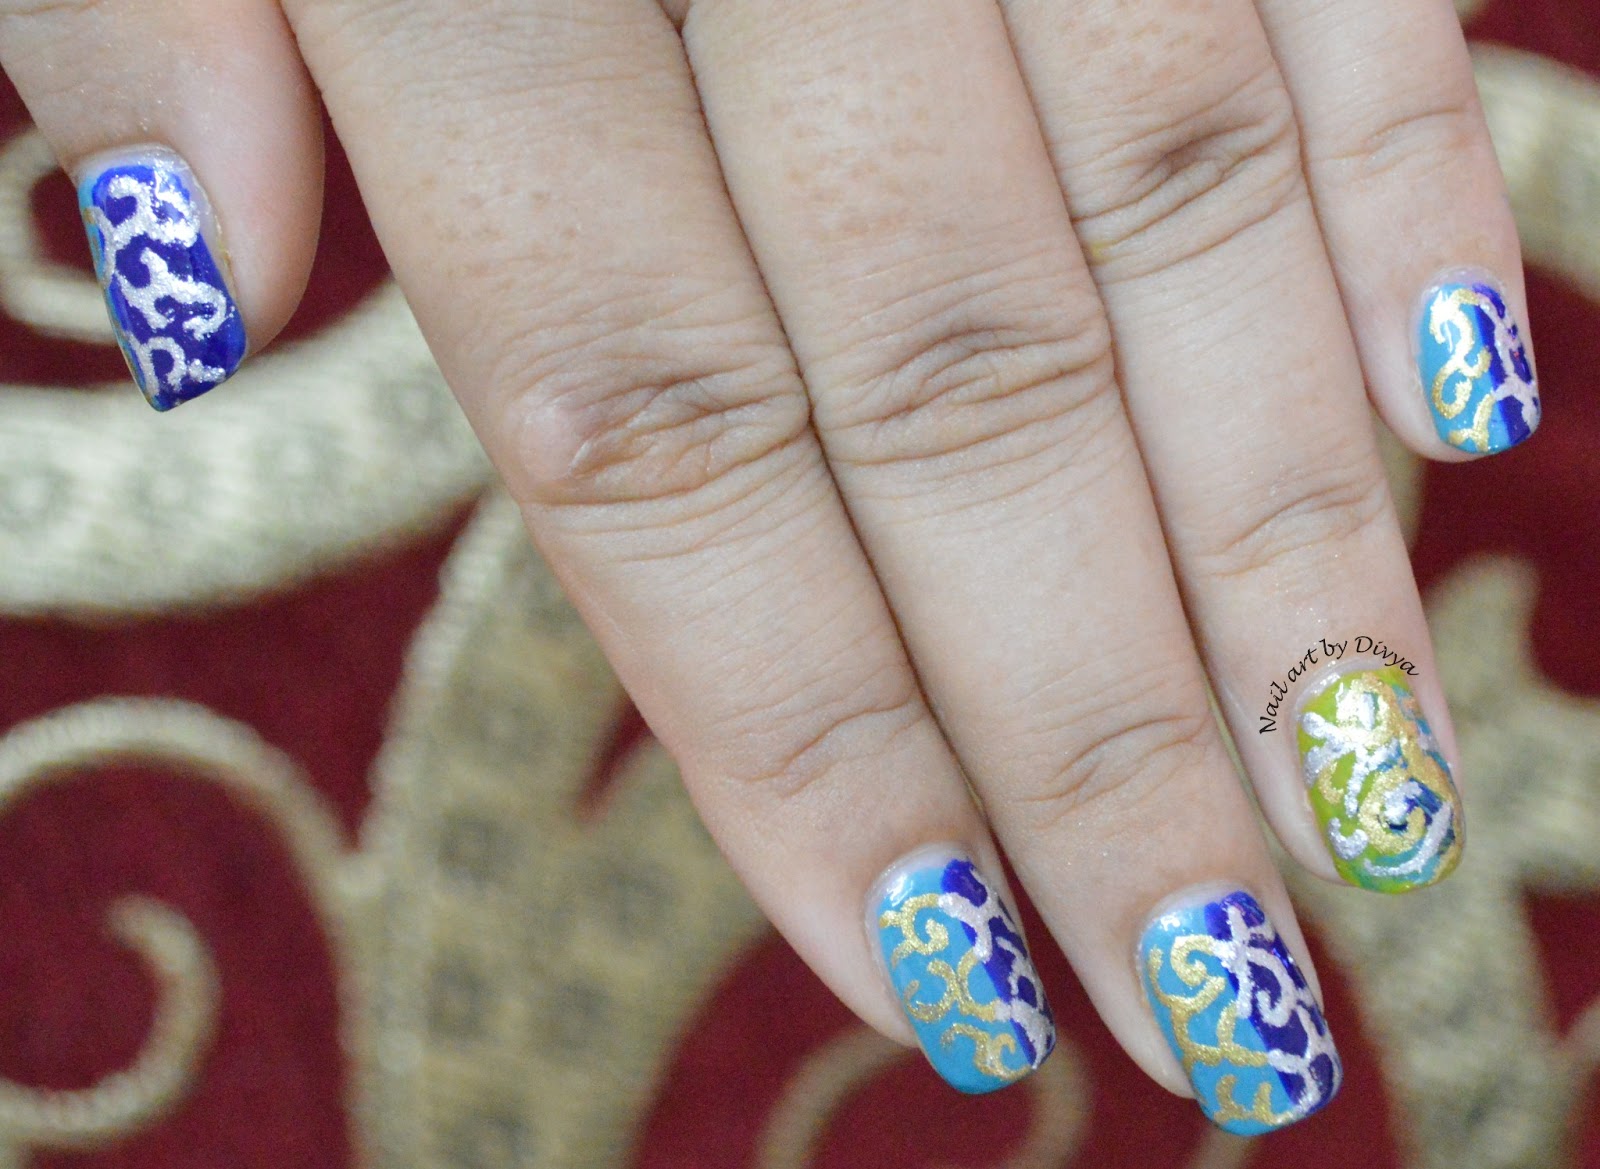
After applying base coat, I applied the Elle 18 blue color on half of the nail and covered the other half with Revlon's royal. On ring finger I applied Gaits' green color and dry marbled it with the two blue colors (hope you can see the effect). After this step I saw the nails and they were looking very empty, so I drew swirls using golden and silver acrylic paint. I used golden color over the light blue color and silver over the dark blue one. Though, I messed up my ring finger but other fingers turned out fine.


Sealed the design with a top coat and I was done
Hope you liked my design. Do lemme know your views on it. 

Have a lovely day

xoxo


Thursday, 18 July 2013

TPC #2 and Born Pretty store Silicone Printing Template Review

Heya!!!! hows you all???? Today is the day number two of the TPC for July and I am excited as this time I did my mani using the born pretty store's silicone template. Will let you know about these aweome templates, but first let me show you the design which I created.


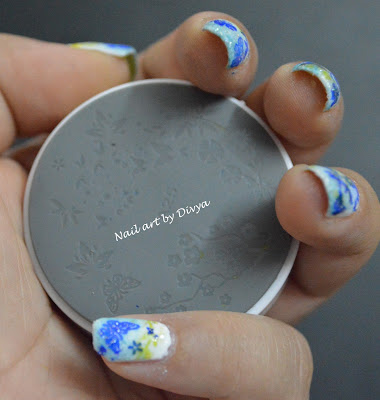
The blue, blue and green polishes used are the same which I have used in the previous mani. the white color I have used is of Lakme . I did an ombre on all the nails with white and light blue polish (Elle 18 #53) after applying a base coat. I then stamped various patterns using born pretty store's nail art stamp silicone printing template #A25 with the dark blue color (Revlon's royal) and green color (Gaits' lonely green). I just dabbed on the nail tips with LA colors holographic glitter and sealed the design with a top coat.


Now about the silicone template. The template comes in five selectable patterns and are made of silicone material. The template which I am reviewing looks like this 
Back of the template
 
The silicone part having different pattern etched to it
The best part of the template it is that no special polish is required for stamping with it. You just have to apply a nail polish over the desired image on the plate. Now there is a polish over the image but there is also excess polish all around it, so, to remove it lay down a newspaper or napkin or anything which has soaking property (I have used newspaper) on a flat surface and stamp gently on it. After doing this 1 or 2 times, the excess polish all around the pattern will stamp over the newspaper and you will be left with the pattern with polish in it. To apply the pattern on the nails, just stamp the pattern by rolling it over you nails and the image will be transferred on your nails. 
I really loved this template because it is easy to use. 

The pros of the template are-
1. Easy to use.
2. No stamper and scraper is required.
3. No special polish is required.
4. Design comes out neat.

The cons of the template are-
1. The template is small in size.
2. The images are very close to each other.
3. Not too many designs as there are only 5 templates available.

The templates are great and very easy to use. Only if there are more designs, then it would have been more cool.

Do check out the templates and buy them here. Use code DVG10  to earn 10% discount on your purchase.

Hope you like the review and if you have any queries and like me to post the images of the way the pattern on a template is applied, do let me know.

xoxo


Tuesday, 16 July 2013

TPC July #1

Hey girls!!!! How you all have been??? I am here with the Crumpet Nail Tarts Tri polish challenge for the month of July. The colors for this month are blue, blue and green. The colors which I have chosen are-
Blue #1- Elle 18 nail pops '#53'
Blue #2- Revlon Top speed 'Royal'
Green- Gaits 'Lonely Green'


Below is the nail art which I did-


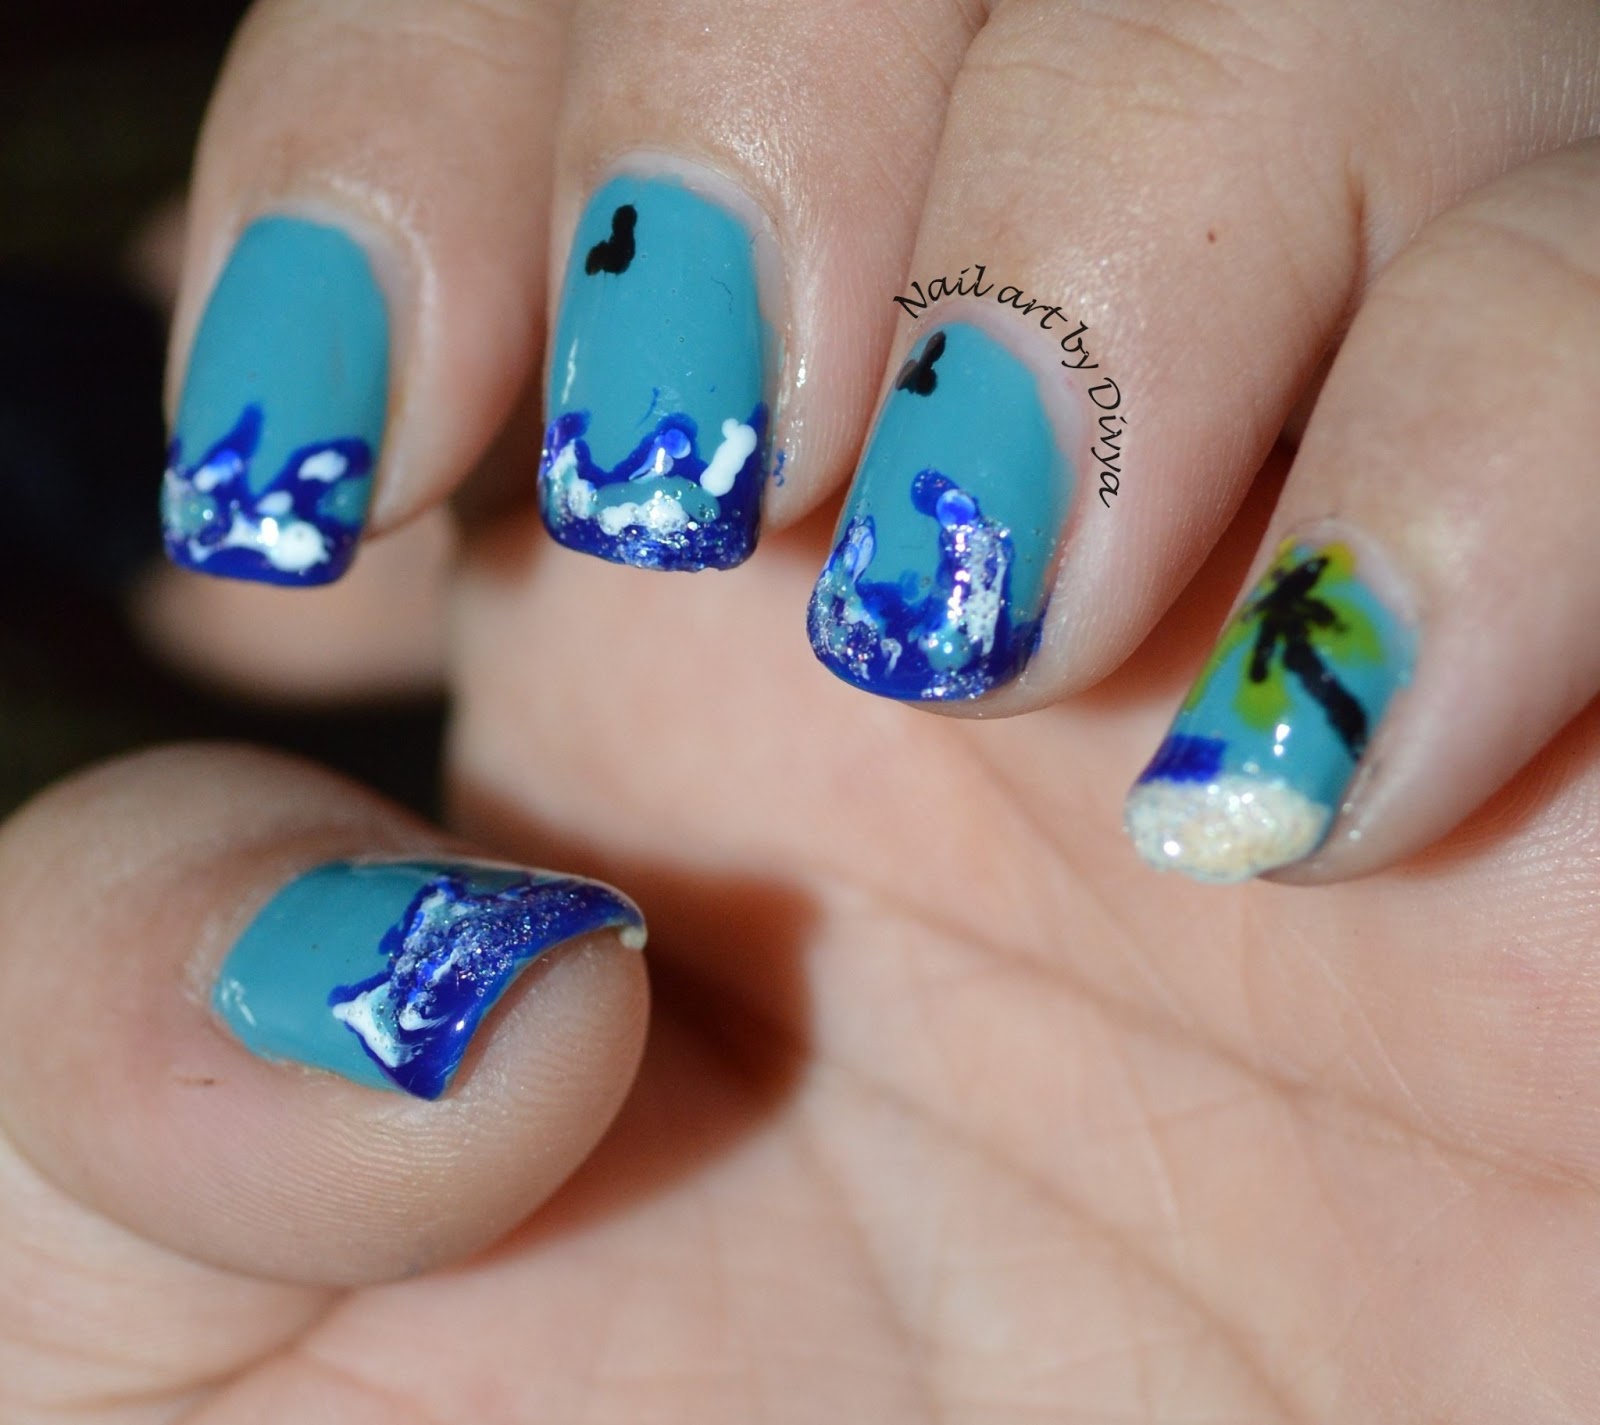
After applying base coat I applied the Elle 18 polish to depict the sky. I then drew waves with revlon 'royal' color and detailed it with white color polish. On the pinkie finger I drew a part of the beach by applying Zoya 'Lulu' and then sprinkling loose glitter powder over it. With the help of the green color I drew a palm tree and detailed it with black color polish. I also drew two birdies with the black color polish. I also sprinkled loose glitter powder over the waves to give it some shiny appearnce.


Though it did not come out as the way I had it in my mind but still I am happy with outcome. 


Hope you all liked it and do have a look at what other girls have designed.

xoxo


Friday, 12 July 2013

One stroke flowers

Hey all!!!!!!! How are you all??? So here I am with my experiment with one stroke nail art. I did this mani few months back and thought of sharing with you. Hope you all like it.


After applying base coat I applied Faces Ultramarine blue nail polish and then let it dry. I have not used any special brush to draw the flowers, I have used a simple 1 number flat brush to draw the flowers. I dipped one end of the brush in pink color acrylic paint and other end in the white color acrylic paint and then drew the flowers. I then drew white dots using toothpick dipped in white color acrylic paint and then applied Jessica's hologram top coat and let it dry. Finally I sealed the design with a top coat.  


Hope you all liked the design.

Do let me know about your views.
Have a great weekend
xoxo

Tuesday, 2 July 2013

Tiger Lily- My Entry for nail art Contest!!!

Hellooooo All the beautiful ladies out there..........
Few days back, a nail art contest was organized by Rajani Bhatt of "Perfecting the Imperfection". The contest ended on 30 June 2013 and here is my entry for the contest. Please vote for my entry by clicking here and also see what other beautiful ladies have created.


The polishes used are of brand "Womsee" and I have created the flower using Acrylic colors.


Hope you all liked the design. Please vote for me here

xoxo

Thursday, 27 June 2013

TPC June- Day Four

Hello all the beautiful ladies out there. How are you all??? So this month is coming to an end and with it half of the year will be gone!!! How time flies by.....ahhhhhhhh!!!!!!!

Today I am here with the fourth TPC mani for june. I was not feeling well so I just kept it simple.


The nail polish used are the same which have been used in previous manis
I tried to have a washed up effect and thought how will the mani look if I use all the three color. So here is what I did.
After applying the base coat apply pink color nail paint on all of your nails, let it dry. apply red color polish over it and with a crumpled up polythene sheet dab here and there on the red polish while its still wet. apply a clear polish or top coat to blend in the two colors. After it dries apply purple color polish over it and again dab on it with crumpled poly sheet. After this step though the red color underneath was visible but the pink color almost disappeared!!!! I hope you can see the little tinges of pink color. Apply top coat to blend in the colors. The nails were looking empty so, I thought of doing some stamping (And tell you what, I suck at it!!!!). So, with Konad stamping plate no.31 and konad special polish in silver I stamped in the flowers on my ring finger. I then again applied a top coat to seal in the final design.

P.S. I messed up my thumb, so please ignore.. :P

Hope you liked the design.
xoxo

Have look at other TPC Designs


Tuesday, 25 June 2013

TPC- Day 3, Using Born Pretty Store Metal Chains

Heyaaaa!!! 
Its the third day of TPC June and I am here with a very simple mani.


The colours used are the same-
Purple- Street wear "Lilac Martini"
Pink- Coloressence "Barbie Pink"
Red- Maybelline Colorama "Graus"

The chains are 'Punk Style Metal Chain Line' from Born Pretty Store. I had won them in  a giveaway by Born Pretty store during April. They come in two colours- gold and silver and two sizes- 2mm and 1.6mm and are 100cm in length. I was thinking of doing a design with them but could not think of anything!!! So, I thought of putting them in one of the TPC.
There are very simple steps to this mani. Apply base coat. French tip them with pink and red colors alternately. Cut the chain according to your nail breadth and stick them in between where purple and red/pink colors meet. 
Tip: It's better to use a glue rather than clear polish to stick the chains as they will stick properly and will not come out from the edges (like they did in mine and thus have to stick it again and again with a clear polish) and do not forget to apply 2-3 coats of topcoat to make the mani wearable for a long time.


Hope you liked the design. 
To buy these funky chains click here. Use Code DVG10 to get sitewide 10% discount.

Have look at other works